5 Best Tips To Remove Scratches from Acrylic Sheet
When using clear acrylic panels for display cases, signs, protective shields, or ornamental panels, scratches can quickly detract from the panels visual appeal. An acrylic sheet that has scratches on it appears dull, hazy, or even unprofessional to fabricators or end users. The acrylic may be restored to nearly crystal clarity and most light to moderate scratches can be eliminated with the correct methods.
Being one of the top acrylic fabricators in Dubai, Pleasant Acrylic LLC is aware of how annoying this issue is. Five useful, simple-to-follow ways to remove scratches and revitalize your acrylic glass surface are included in this blog. Along with comparing plexiglass vs acrylic glass, we will walk you through each step and help you choose the best technique for your sheet.
For readers looking to achieve a flawless shine after removing scratches, our detailed guide on How to Polish Acrylic Sheets to a Crystal-Clear Finish offers step-by-step instructions to help you restore the perfect transparent look.
Plexiglass vs Acrylic Glass — a quick note
Understanding the substance is helpful before moving on to scratch removal. Acrylic glass is frequently used interchangeably with plexiglass. Although plexiglass has become a general term for acrylic sheets, Plexiglas is really a brand name for cast acrylic.
- Cast acrylic (Plexiglas style) typically has better optical quality and more resistance to scratching than extruded acrylic.
- Acrylic (PMMA) light transmission is excellent (≈ 92 % of visible light) and it weighs about half that of glass.
- However, acrylic is softer than glass in terms of hardness, making it more vulnerable to scratches.
Knowing your sheet type (cast vs extruded, coated vs uncoated) helps you pick the right scratch removal approach.
5 Best Tips to Remove Scratches from Acrylic Sheet
Here are five proven tips to reduce or eliminate scratches from acrylic sheets. Use them with care, in a clean, dust-free workspace, using soft microfiber cloths, proper abrasives, and polishing compounds.
1. Clean and Prepare the Surface
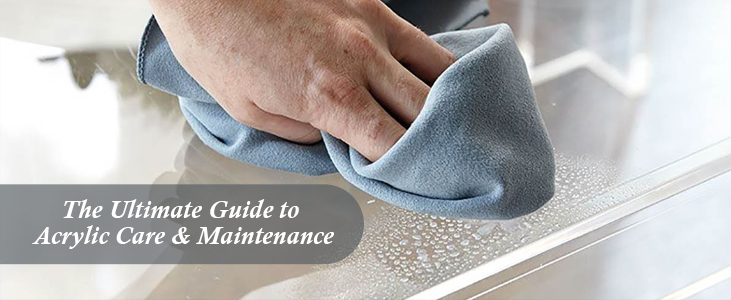
Thoroughly clean the acrylic to get rid of any dust, grime, or impurities before trying any repairs. Use a soft microfiber cloth and a mild, non-abrasive soap or detergent that has been diluted with water. Rinse thoroughly, then pat dry or let it air dry.
What makes this significant? During polishing, any hard particles (grit, sand) that are still present may cause further scratches to the surface.
2. Wet Sanding with Descending Grit
Wet sanding usually works well if the scratch is more than superficial (visible in the light but not deep).
Method:
1.Start with sandpaper that has been soaked in warm water and has a finer grain (such as 800 or 1000 grit).
2.Keep the acrylic surface wet and the sandpaper separated by a thin layer of water.
3. Sand softly, not in circles, but in straight lines (from left to right, for example). Try not to push too hard.
4. Change to a finer grit (such as 1,500) after the scratch starts to merge, and then to 2,000.
5. Once finished, use a plastic polishing product to polish the surface after rinsing and drying it.
Wet sanding with about 2,000 grit is beneficial, according to many users: “The only solution is wet sanding with about 2000 grain sandpaper. Don’t massage too vigorously.
3. Use a Plastic Polishing Compound
Clarity can be restored using a decent plastic polish after sanding (or even for little scratches where sanding is not necessary).
1. PMMA surfaces are intended for products such as Novus, Plexus, or commercial acrylic polishing compounds.
2.Make use of a soft cloth or a clean microfiber pad.
3.Rub a tiny bit of polish on and then move it back and forth or in a circular motion.
4.Check your progress often, and stop when the scrape fades or goes away.
Some scratch−remover kits include a sequence: a rougher compound to remove haze, then a finer polish.
This method is ideal for moderate scratches that aren’t too deep to require resin filling.
4. Use Heat or Hot-Rolling (for fine lines)
A mild heating method (commonly referred to as “hot rolling”) can be effective for extremely tiny scratches (micro scratching):
1.Make use of a polished stainless steel block that has been moderately heated.
2. As it glides smoothly, carefully press it over the scratched area.
3. The scratch edges are closed when the heat causes the acrylic edges to gently melt or flow.
4. To protect and guide the surface, use a gentle cloth.
This technique is documented in conservation and restoration methods for acrylic used in face-mount glazing.
Caution: Excessive heat or pressure can cause warping, bubbling, or distortion. Practice carefully and test on scrap material first.
5. Fill Deep Scratches With Resin or Kit
You could require a scratch removal kit or resin filler if the scratch is deep enough to feel your fingernail snag.
1. These kits frequently come with a finishing polish, applicator, and transparent resin that is compatible with PMMA.
2. Start by cleaning the space.
3. Use a syringe or fine tip to apply the resin sparingly into the scratch.
4. After allowing it to cure as directed, polish the area and scrape off any extra resin.
5. To blend, use a clear polish last.
This approach requires more labor and is most effective when deep repair or salvaging a valuable item is required.
Additional Tips & Precautions
To get the best results and avoid further damage, keep in mind:
1. To see when the scratch starts to fade, work in well-lit areas.
2 Avoid using dry grit or sandpaper and always use wet abrasives.
3.To prevent leaving oils or fingerprints, put on protective gloves.
4. Sanding should only be done in the impacted region; avoid overworking the unaffected areas.
5. Be patient. Gentle pressure applied several times usually yields better results than forceful attempts.
6. Before trying the actual section, practice on a scrap piece of the same acrylic.
Also, some modern acrylic sheets by acrylic Sheet Suppliers in Dubai come with a scratch-resistant (hard coat) surface. If yours has such a coating, aggressive sanding or heat could strip that off—check manufacturer guidance first.
Why These Methods Work (Brief Technical Insight)
1.Due to its softer texture than glass, acrylic (PMMA) is more prone to scratches.
2. After sanding the scratch until it is too shallow to scatter light, polishing it brings back its optical clarity.
3. The reason the heating method works is that when heated, acrylic can “flow” a little, smoothing down tiny ridges.
4. Because resin fillers have the same refractive index as acrylic, the repaired region is almost undetectable after polishing.
Example Workflow (Step-by-Step)
- Inspect the scratch under light; classify as “very light,” “light/moderate,” or “deep.”
- Clean the surface thoroughly.
- For light scratches, skip sanding — start polishing the compound directly.
- For moderate scratches, proceed with wet sanding: 800 → 1,500 → 2,000 grit.
- Apply plastic polishing compound, buff to clarity.
- For fine micro-scratches, use gentle heat/hot rolling.
- For deep scratches, use a filler resin, then polish.
- Finally, rinse the area and wipe with a fresh microfiber cloth.
When to Call a Professional

If the scratch is very deep, or the sheet is large, curved, or in a critical application (e.g. window glazing, museum display), it’s often safer and more economical to reach out to specialized acrylic fabricators. Professionals have precision polishing equipment, CNC finishers, and controlled heat/laser systems that reduce the risk of damage.
In the UAE, acrylic fabrication is a booming industry—many clients depend on fabricators not just for forming and cutting, but also for finishing, polishing and scratch repair services. Hiring a specialist ensures optical clarity, consistent finish, and long-term durability.
Also read: Best Practices for Cleaning and Maintaining Acrylic Display Stands
Conclusion
Your acrylic panels don’t have to be permanently marred by scratches. In most situations, clarity can be restored using the appropriate method, such as cleaning, mild wet sanding, polishing, heating, or resin restoration. Always test on scrap first, start cautiously, and use the mildest technique possible.You can handle cosmetic damage with confidence if you know these five tips, regardless of the size of your project. When in doubt, seeking professional assistance—such as from specialists in polishing and maintaining acrylic glass sheets can guarantee faultless results and save time.
Pleasant Acrylic is a leading provider of premium acrylic products, offering Podium Manufacturers Dubai, Acrylic Laser Cutting Service in Dubai, Acrylic Plastics in Dubai and more. As trusted Acrylic Glass Suppliers in Dubai, Dealers of Acrylic Plastic UAE, and expert Acrylic Dome Manufacturers in Dubai, they deliver quality, style, and durability for every project.
FAQ
What polishing kits or products are popular for acrylic scratch removal?
Products like the Novus 1-2-3 acrylic polishing kit often get recommended on DIY forums.
Will toothpaste work to remove light scratches on acrylic?
Can headlight restoration kits or car polishing compounds be used on acrylic panels?
Some users suggest using plastic polish or headlight kits (wet sanding + polish) to buff acrylic surfaces.
How do I know whether to wet sand or use resin filling for a scratch?
If the scratch catches your fingernail or feels deep, resin filler may be needed; shallow surface marks are better treated via wet sanding and polishing.
What grit progression is safe for wet sanding acrylic without damaging it?
Many suggest starting at 800–1000 grit, then progressing up (e.g. 1,500 → 2,000) before polishing.