Unleash Your Creativity: Master the Art of Molding Acrylic Sheets!
Have you ever marveled at the captivating sculptures, elegant displays, and sleek home decor pieces made from clear plastic sheets? The world of acrylic sheet molding is a canvas for boundless creativity, offering endless possibilities to turn your artistic visions into reality. With clear plastic sheets at your fingertips, you can unlock a realm of artistic expression and functional design that’s limited only by your imagination. This blog is your gateway to the fascinating world of molding acrylic sheets, providing you with the knowledge and techniques needed to harness the potential of clear plastic sheets in your creative endeavours. From basic molding techniques to advanced projects, we’ll guide you through the process of working with acrylic sheets and help you master this versatile medium.
Know more about acrylic sheets
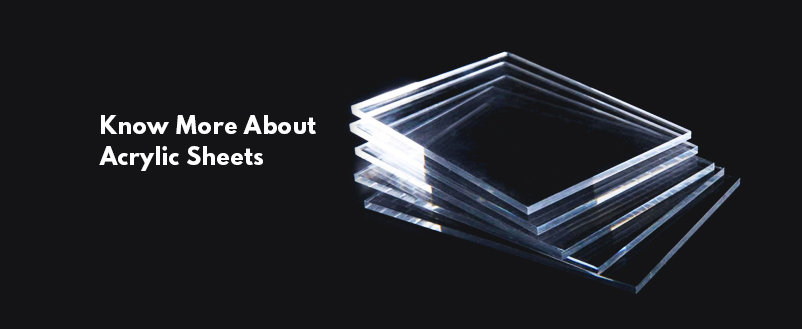
Acrylic sheets, also known as custom acrylic sheets, are flat, transparent materials made from a plastic called polymethyl methacrylate (PMMA). They come in various thicknesses and can be cut and shaped to fit different project needs. There are different types of acrylic sheets, such as cast acrylic and extruded acrylic. Cast acrylic is clearer and better for molding, while extruded acrylic is more budget-friendly. You can also find coloured and textured acrylic sheets for added creative possibilities. Acrylic sheets have gained popularity in creative projects because they are lightweight, durable, and versatile. They can be molded into various shapes, making them perfect for art, signage, displays, and more. Their clarity and adaptability open the door to endless creative opportunities in acrylic molding.
Tools and Materials
To shape acrylic sheets, you’ll require tools like a fine-toothed saw for cutting, a heat gun for bending, clamps to secure pieces, and sandpaper for a smooth finish. Materials include acrylic cement for bonding and various grits of sandpaper for polishing. Safety is crucial. Wear protective gear, like safety goggles and gloves, to shield your eyes and skin. Work in a well-ventilated area to disperse fumes from heated acrylic. Be cautious when using heat guns to avoid burns, and keep flammable materials away from hot surfaces. Always follow safety guidelines for your tools and materials. If you want to make an acrylic cosmetic box in Dubai, check out the blog “How to make an acrylic box?”
Preparing Your Workspace
Before starting your acrylic sheet project, clear clutter from your workspace to create a clean and organized environment. This will make it easier to manoeuvre and work efficiently. Ensure your workspace has good ventilation to disperse any fumes or odours that might arise during heating or glueing acrylic. Adequate lighting is essential for precision, so use bright, even lighting to prevent shadows. Arrange your tools within arm’s reach, so you can access them easily while working. This keeps your workflow smooth and efficient.
Basic Techniques for Molding Acrylic Sheets
- Cutting acrylic sheets to desired shapes and sizes: Precision cutting is a fundamental skill in acrylic fabrication. To cut acrylic sheets, you can use several tools, including a fine-toothed saw, a scoring knife, or a specialized acrylic laser cutter. Before cutting, mark your desired shape with a straight edge and a pencil. For straight cuts, use a saw or scoring knife, making several passes to avoid chipping. For curves, consider a coping saw or a jigsaw. Finish edges by sanding with fine-grit sandpaper for a smooth, polished finish.
- Bending and heating techniques for molding: Acrylic sheets can be molded into various shapes through controlled heating. Use a heat gun, which produces hot air to soften the acrylic. Ensure the acrylic is evenly heated, but avoid overheating to prevent bubbles or warping. Once it’s pliable, gently bend or shape it into the desired form. A bending jig or a template can help maintain precision. Cooling the acrylic slowly will set the shape. Practice is essential to master this technique, as it can be challenging to achieve the perfect bend.
- Joining acrylic pieces together securely: Acrylic pieces can be joined together using several methods, including solvent welding with acrylic cement or using mechanical fasteners like screws or bolts. Solvent welding involves applying acrylic cement to the surfaces to be joined and pressing them together. The cement chemically bonds the pieces, creating a strong, transparent connection. When using mechanical fasteners, be sure to pre-drill holes to prevent cracking. The choice of joining method depends on the project’s requirements, with solvent welding providing a seamless and nearly invisible bond, while mechanical fasteners offer more disassembly flexibility.
Remember, practising these basic techniques is essential to gain proficiency in acrylic sheet fabrication. Acrylic molding requires patience and skill development, so don’t be discouraged by early mistakes. As you gain experience, you’ll unlock the full creative potential of acrylic sheets in projects ranging from artistic displays to functional acrylic glass panels and even intricate acrylic laser cutting.
Advanced Molding Techniques
- Exploring 3D shapes and designs: Acrylic’s versatility allows you to venture into creating intricate 3D shapes and designs. Start by visualizing your project, whether it’s an acrylic name board or any other acrylic design in Dubai. Consider the form you want to achieve, and plan your cuts and bends accordingly. For complex designs, create a template or mold that matches your vision. It’s crucial to maintain even heating throughout the process to avoid warping. Practice with scrap acrylic until you’re confident in achieving the desired 3D effect.
- Techniques for creating curves and angles: Achieving perfect curves and angles in acrylic molding requires precision and patience. For curves, a custom bending jig can be immensely helpful. Craft one from wood or metal to match your desired curvature. Secure the acrylic in the jig and heat it evenly to achieve a smooth curve. For sharp angles, consider using a strip heater or line bending techniques. Be cautious when bending at angles to prevent stress fractures. Proper cooling and clamping will help maintain the formed shape. With practice, you can master the art of crafting beautiful curves and angles in acrylic.
- Combining acrylic with other materials for unique projects: To take your acrylic projects to the next level, consider integrating other materials like wood, metal, or acrylic UV printing for eye-catching effects. Acrylic signage, for instance, can be enhanced by backlighting it with LEDs or integrating it into a wooden or metal frame. Acrylic can also be UV printed with intricate designs or images, adding depth and vibrancy to your projects. When combining materials, ensure that they are compatible and securely joined. Experiment with different combinations to create truly unique and captivating pieces that stand out in terms of both form and function.
Mastering these advanced molding techniques opens the door to a world of creative possibilities, from awe-inspiring 3D designs to innovative combinations of materials. Whether you’re crafting acrylic podiums in Dubai or acrylic stands, these techniques will help you achieve remarkable and unique results.
Conclusion
This blog has equipped you with the fundamentals and advanced techniques of working with acrylic sheets. From basic cutting and bending to the creation of 3D shapes, you now have the knowledge to mold acrylic with confidence. The world of acrylic molding is a canvas for your creativity. Start your acrylic molding journey today and turn your ideas into stunning, functional pieces of art. Mastering acrylic painting will enhance the aesthetics of the acrylic products. We’d love to hear about your acrylic sheet projects! Share your creations or ask any questions you may have in the comments below. Let’s continue to explore the endless possibilities of acrylic molding together.