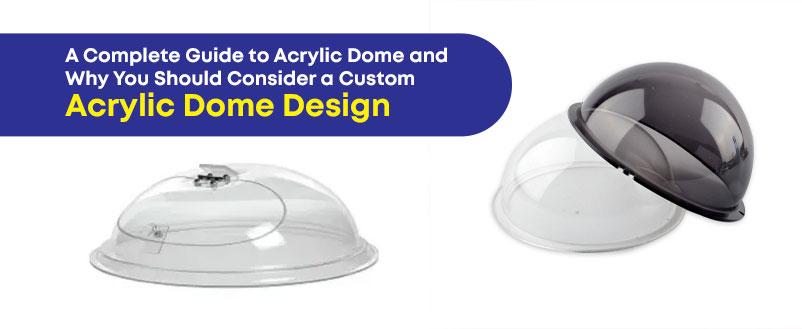
Acrylic nails have evolved into a very renowned beauty treatment in the current era and the craze is still getting bigger. With advanced styles and ideas rising, people prefer how to learn to do acrylic nails themselves. Acrylic fabricators in Dubai have been successful in molding the acrylic sheets into various useful products like coffee cups, acrylic furniture, acrylic plastic, acrylic nail products, and so on. The high-quality acrylic products from the top Acrylic company in Dubai are used to make acrylic nail kits and other acrylic cosmetic products, which can be used to start painting your acrylic nails perfectly at home. Here is the ultimate beginner’s guide to give you insights on doing the acrylic nails effectively at home.
For ages, Acrylic plastic has been doing wonders, with more and more products evolving out from them, and acrylic nails are an impressive and incredible outcome of all. When you do acrylic nails at home, this is not only saving your money but has developed into a growing hobby among people. If you have ever thought of trying out and learning this art, then it is no longer going to remain as a wish, rather becomes easy when you read this blog and follow the tips to start with doing acrylic nails on your own. Before getting into doing the acrylic nails, ensure you have every prerequisite mentioned in the coming section, right in your hand, so that you can start them without worrying about missing the major elements.
Table of Content
Equipment for Acrylic Nails at Home
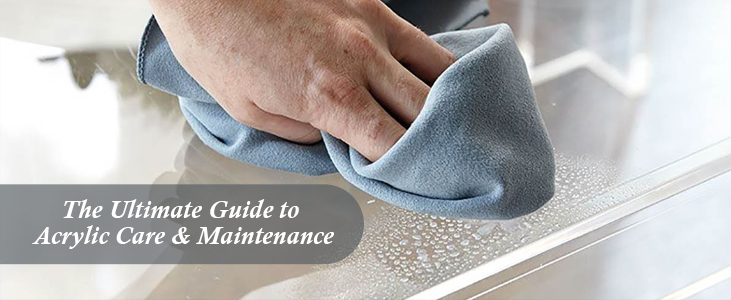
Acrylic equipment like acrylic furniture, acrylic roofing sheets, acrylic aquarium, acrylic panels, and more, have been highly in demand. This is because people can easily maintain them by following the ultimate guide to acrylic care and maintenance. It is significant to have the right products to do the acrylic nails since you must ensure that the acrylic nails look vibrant and don’t cause severe damage or spoil your natural nails. The following section deals with the essential list for beginners and optional list, where the former deals with inevitable products you must have while doing a set of acrylic nails, while the latter deals with the items that can make your job easier, but not that essential.
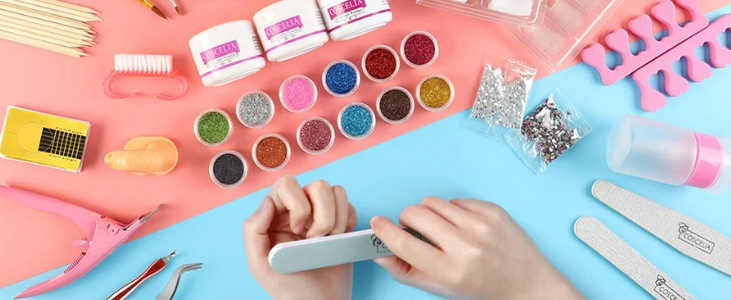
Essential Acrylic Nail Items for Beginners
- Acrylic Nail Powder: this is the powder used to form your acrylic nail which is activated using the monomer for molding and finally forms the acrylic nails.
- Monomer: This is a liquid that is mixed with the acrylic powder, activated, and then the acrylic nail is created.
- Acrylic Brush: You can use the acrylic brush to apply the acrylic to your nails and form your acrylic nail. It is recommended that the beginners use Sizes #10 and #12. Since the bigger-sized brushes can give you more control over the acrylic.
- Nail Dehydrator: This can help you to remove the moisture that is present in the nail to allow the acrylic to stick better and avoid possible fungal infections.
- Acid-free Nail Primer: The primer works with the dehydrator and benefits you by removing oils/moisture from the nail bed. It also removes the possible air bubbles, thereby improving the adhesion properties.
- Topcoat: With topcoat, the finished manicure looks more shining, and can seal both your false nails and regular nail polish firmly, to avoid chipping and last for long.
- Buffing block: You can smoothen out the ridges to make the nails more shining and healthy. It can also let your nail polish adhere properly.
- Nail File: The nail file can let you shape the nails and make the sides more structured and even. Some people prefer using an electric file which is quicker.
- Paper Towels: Paper towel is important to clean the acrylic nail brush while applying acrylic on nails.
Optional Acrylic Nail Items
- Color acrylic powder: The colored acrylic powder can be used above the transparent acrylic layer instead of using nail polish. You can try making use of both clear acrylic and the color acrylic powder if you are new since they possess varied consistencies. You can use nail polish instead if you prefer.
- Nail Tips: If you wish to add length to your actual nails, you can use artificial nail tips.
- Acrylic Nail glue: This is used to stick on the tips of nails to glue with your natural nail.
- Nail scissors: The nail tips cutter or nail clippers can be used to cut the nail tips into the length you require. If you don’t require the specific ones you can go for any standard nail clipper.
- Cuticle Oil: With cuticle oil, you can add moisture to cuticles and the skin surrounding your nails.
- Acrylic dish: This is used to pour and keep the liquid monomer to access it whenever applying the acrylic.
You can place these products and must-have items in dedicated acrylic storage boxes if you prefer getting easy access to the items, with their transparent finish.
How to Apply Acrylic Nails
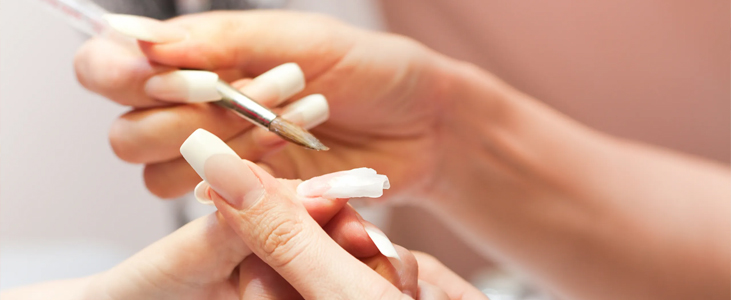
While you apply acrylic nails, make sure you have ample acrylic lighting to note the precise changes made to your nails. You can go through the various acrylic lighting ideas and choose your preferred lighting to maintain a makeup and grooming space at your home. Here is the step by step guide to do your nails beautifully. Note that the optional steps are not mandatory, however, nails look more professional if you follow this five step guide.
Step 1: Nail Prep
You need to ace prepping nails to make nails healthy before you start doing your nails.
- Use a cuticle pusher to gently push your cuticle back, and make sure there are no remains of the cuticle on your nail bed since remains don’t allow the acrylic to stick to it.
- Make use of a buffing block to add shine to your nail with soft swiping left and right on the nail bed.
- Use a manicure brush or lint-free cotton pads dipped in acetone for the removal process of the dust and remains from the nail surface.
Step 2: Applying the Nail Tip (Optional step)
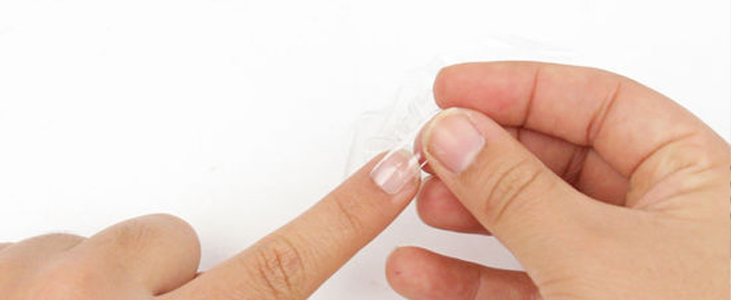
If you are one of the nail enthusiasts and want nail tips to make your real nails look lengthy with great nail skills, follow these steps, else you can skip to the next section.
- Get the right-sized nail tips to fit your nails and further lay them out to be prepared.
- Apply a small coat of nail glue to the nail tip, the spot where it meets your natural nail bed.
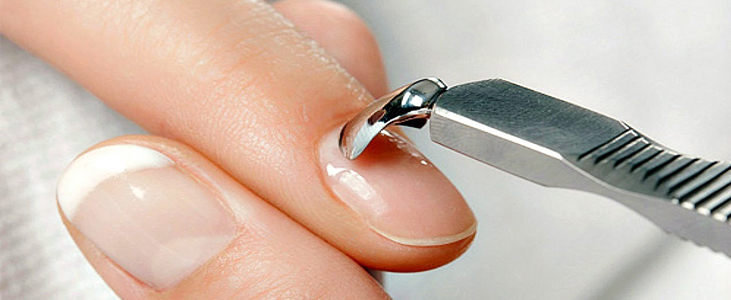
- Push, press, and hold your nail tip to the nail for around 10 seconds, or till you feel that the tip is stuck. Use a pinching tool or tweezers to push the wings down, if you feel the nails are lifting from the sides.
- Use nail scissors or tip cutters to snip the nail tip as per your desired nail length.
- You can now file the nail tip toward the shape you prefer, say square, almond, or coffin, etc. Remember not to file upwards since it can pop off, supporting the upper part of the nail during filing to prevent it from occurring.
- If the tip is not correctly blended with the natural nail, you can gently buff it over the nail join with a soft file, nail buffer, or a lint-free pad dipped with pure acetone.
- Make sure that there are no dust remains and apply a nail dehydrator to the complete nail bed, to let the air dry and leave a matte finish.
- Finally, apply the nail primer to your nail bed, and ensure it is acid-free.
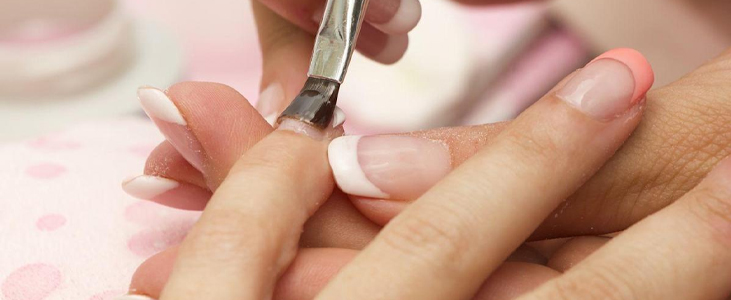
Step 3: Applying the Acrylic
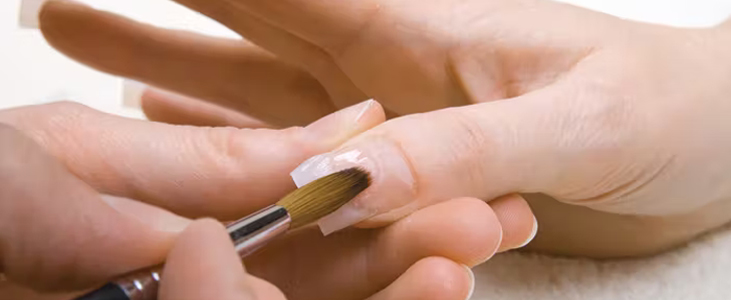
- Add the acrylic liquid to the dappen dish.
- Dip your acrylic brush to the liquid in a dappen dish and push the tip of the brush to the bottom, so that the air bubbles are removed.
- Get the excess liquid off from the dappen dish and swipe the brush across the edge.
- Now, dip the acrylic brush tip to the acrylic powder and then stroke the brush until you make a ball of acrylic similar to the small golf ball.
- Drain the excess liquid by pressing the brush with an acrylic powder ball to a clean lint-free pad.
- Apply the acrylic ball to your nail on the top near the cuticle area, and tilt the nail down to prevent the acrylic from crowding the cuticles.
- Press the brush flat on your nail and move the acrylic to smoothen out bumps, and spread it evenly.
- You can also add more acrylic and cover the entire nail by repeating the same steps until you are satisfied with the nail coverage.
Step 4: Using a Pinching Tool (Optional step )
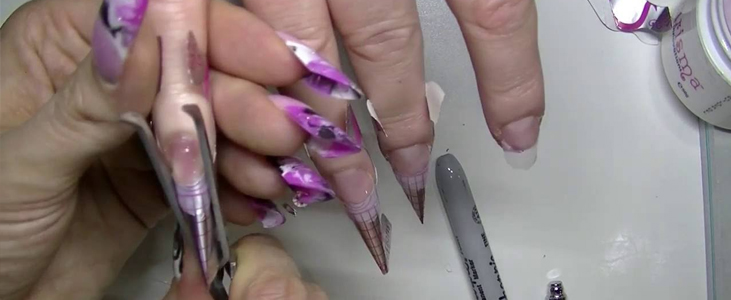
This step is not meant for beginners. If you feel confident in doing the basic acrylics, then this step is for you, else move to the next steps. You can make use of a pinching tool to make longer nails, and a stronger C-curve, which will make the looks more stylish and slender.
- While the acrylic is drying, keep the pinching tool on your nails like a clamp and pinch it as you require by moving the tool down the nail.
- Wait for it as it is for three minutes and tap your nail to see if that makes a ting sound. If this doesn’t happen, wait longer, and then finally remove the pinching tool, squeezing the ends apart.
- Wait for 2 more minutes to let the acrylic dry and now it should make the ting sound while you tap.
- File the whole nail till it is a smooth surface on the top and around the nail edges, making a more defined shape.
Step 5: Seal the Acrylic
- Add a topcoat that can seal the acrylic well. To do this you can either use a lamp to dry the acrylics or apply the top coat with an air-dry top coat and leave it for 2 minutes.
- If you use the lamp, you can apply either a glossy or matte top coat depending upon the finish you desire. Place your hand beneath the lamp and turn it on. Dry it for 2-3 minutes under the UV lamp, or 1 minute under the LED lamp. Remove your hand once the time is up.
- Add a cuticle oil stroke to the cuticle area of every nail and rub it using your fingers.
And yes you are all done. You can be proud of doing acrylic nails all yourself and with practice, you will be able to ace this art.
Wrap Up
Though many people are blessed with long neat and clear nails, almost everyone depends on manicures and other nail treatments to maintain their nails. Acrylic Cutting and engraving have given birth to numerous acrylic laser cut products, however, acrylic nails have been trending nowadays due to the shining texture, and the perfect finish they give to your nails. People give more importance to 3D nail art and nail designs, which have now been a matter of beholding the fashion statement up with fake nails. If you follow the above steps and engage in practicing them, you might not need professional manicurists, nail professionals, or any nail expert to let your nail cure and nail art dreams be made a reality. If you are interested in exploring some exciting acrylic-based hobbies, you can check out the acrylic craft ideas you can try at home.